Why Every Photographer Should Carry a Nodal Rail | Camera Gear Tips
There are certain pieces of camera gear that seem to have one very specific purpose.
You buy them because you need them for a particular type of photography, and most of the time they stay in the bottom of your camera bag until that particular situation comes along. A nodal rail might appear to be one of those pieces of equipment. After all, when most photographers hear the words “nodal rail,” they immediately think of panoramic photography. And yes, that is one of its most important uses. But after using rails for years, I’ve found that a good rail can be useful for much more than panoramas. In fact, I think there is a very good argument for keeping one in your camera bag even if you rarely—or never—shoot panoramas.
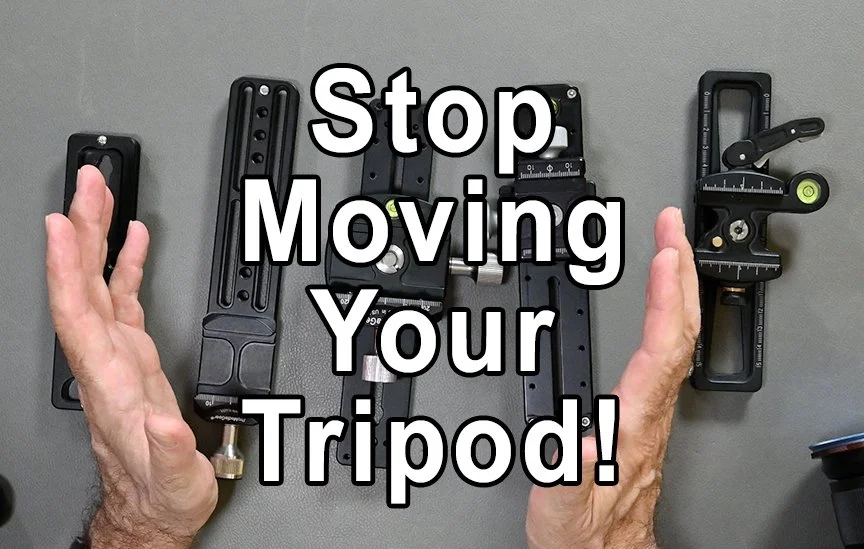
At its most basic, a rail is simply a way of moving your camera forward and backward without moving the tripod. That may sound like a fairly minor convenience, but once you start using one, you quickly realize just how useful that additional movement can be. There are times when moving the entire tripod is easy, and there are other times when moving the tripod can completely change the composition you have already worked so hard to establish. A rail gives you another option.
The most obvious application is panoramic photography.
A nodal rail allows you to position the camera and lens so that you can rotate the camera around the appropriate point, reducing the possibility of parallax problems that can make panoramic images difficult to stitch together. By sliding the camera forward or backward on the rail, you can establish the proper position for a particular camera and lens combination. Once that position is established, you can rotate the camera and capture your series of images with much greater confidence. There is considerably more to setting up a camera correctly for panoramic photography, including determining the proper position for different lenses, so I’ll save that discussion for another article. But the panoramic application is only the beginning.
One of my favorite uses for a rail has nothing to do with panoramas at all. It has to do with balance.
If you have ever mounted a long, heavy lens on a tripod, you know that the weight of that lens can extend quite a distance in front of the tripod head. Even though your tripod and head may be perfectly capable of supporting the weight, the setup can become front-heavy. That can make composing more difficult and can put unnecessary leverage on the tripod head. If your lens has a tripod collar, that certainly helps, but there are still situations where being able to adjust the position of the camera and lens can make a noticeable difference.
A rail allows you to slide the camera and lens forward or backward until you find a better balance point. Instead of simply accepting whatever position the camera happens to land in, you can adjust the setup so that the weight is distributed more effectively over the tripod. When you loosen the tripod head to make a composition adjustment, the camera is less likely to want to fall forward or backward because of the weight of the lens. More importantly, the entire setup simply feels more controlled.
That ability to make small adjustments without moving the tripod is really the key to understanding why a rail can be so useful. Once your tripod is positioned exactly where you want it, you don’t necessarily want to move it every time you need to make a small change in camera position. A rail gives you that additional degree of control.
This becomes especially valuable when working in macro photography.
Imagine that you’ve carefully positioned your tripod in front of a flower. The tripod legs are sitting exactly where you want them, the camera height is right, and you’ve established the composition you’re looking for. You look through the viewfinder and realize that the camera is just a little too far away from your subject.
Normally, the solution would be to move the tripod closer.
But what if there is a bed of flowers between you and the subject? You certainly don’t want to step into the flowers just to move your tripod. Perhaps there are rocks, branches, a fence, or some other obstacle preventing you from moving the tripod forward. Or maybe the tripod is already positioned on the best available piece of solid ground and moving it would create an entirely new set of problems.
This is where a rail can seem almost like a magic trick.
Instead of moving the tripod, simply loosen the rail and slide the camera forward.
Now the camera is closer to your subject, but the tripod hasn’t moved. The tripod legs are still exactly where you placed them. The camera height hasn’t changed, and you’ve retained much of the composition you carefully established. You’ve simply extended the reach of the camera.
And with macro photography, that small amount of movement can be incredibly important. You may not need to move the camera six inches. You may only need an inch. Sometimes even a fraction of an inch can make the difference between a composition that works and one that doesn’t.
This is one of those situations where photographers sometimes make things harder than they need to be. We become so accustomed to thinking of the tripod as the thing that positions the camera that we forget the camera itself can be repositioned while the tripod remains stationary.
Think of the rail as giving your tripod setup another axis of movement.
Your tripod gives you control over where the support is positioned. Your tripod head gives you control over the camera’s angle and orientation. A rail gives you another way to move the camera forward or backward while keeping the rest of the setup intact.
That can be particularly valuable when you’re working with close subjects, but it can also be useful for other types of photography where precise positioning matters. Focus stacking is another example. A rail isn’t required for focus stacking, and there are several ways to approach the technique, but having the ability to make controlled, repeatable adjustments to the camera position can be extremely useful in certain situations.
The next question is: what kind of rail should you carry?
And this is where I think it’s important not to overcomplicate things. You don’t necessarily need the largest or most sophisticated panoramic rail available. If you’re primarily interested in using a rail for balancing a camera and lens, or for making small positioning adjustments during macro photography, a compact, well-built rail may be all you need.
If panoramas are an important part of your photography, however, I would look for a dedicated nodal rail with sufficient adjustment range and clearly marked measurements. Those markings can be particularly helpful because once you’ve determined the correct position for a particular camera and lens combination, you can record that setting and return to it later.
For a general-purpose rail, I’d look for something sturdy, rigid, and compatible with the tripod system you already use. If your tripod head uses an Arca-Swiss-style mounting system, I would strongly recommend staying with that system rather than introducing another proprietary mounting method. The whole point is to make your gear more versatile, not create another piece of equipment that requires a special adapter.
I would also resist the temptation to buy the smallest and lightest rail simply because it takes up less space in your bag. Weight matters, especially when you’re carrying camera equipment all day, but a rail needs to be rigid enough to support your camera and lens without flexing. A few ounces saved isn’t worth much if the rail doesn’t give you the stability and precision you’re looking for.
At the same time, I wouldn’t automatically buy the biggest rail simply because it has more adjustment. Remember that this is something you’re going to carry. The best piece of gear is often the one that gives you enough capability without becoming so large or heavy that you leave it at home.
And that’s really why I like the idea of carrying a rail.
Most of the time, you probably won’t need it.
You’ll set up your tripod, compose your photograph, and take the picture without ever touching the rail. But every once in a while, you’ll encounter one of those situations where you wish you could move the camera just a little farther forward, a little farther backward, or perhaps just a fraction of an inch.
That’s when a rail goes from being a piece of gear you carry to a piece of gear you are very glad you carried.
It can help you properly position your camera for panoramic photography. It can help balance a camera and long lens on a tripod. It can allow you to move closer to a macro subject without disturbing the tripod or the environment around it. And it can give you precise control over camera position when making small adjustments to a composition.
It’s a relatively simple tool, but that’s part of its appeal.
Photography is full of situations where having one more option can make the difference between getting the photograph you want and walking away frustrated. A rail gives you another option without adding a tremendous amount of weight or complexity to your camera bag.
So don’t think of a nodal rail as simply a tool for shooting panoramas.
Think of it as a way to move your camera without moving your tripod.
Once you start thinking about it that way, you’ll probably find a lot more situations where a rail can come in handy.